Save for Web All
![]() It is generally known that the "Save for Web" tool outputs smaller files, than those saved via "Save" or "Save As" command.
It is generally known that the "Save for Web" tool outputs smaller files, than those saved via "Save" or "Save As" command.
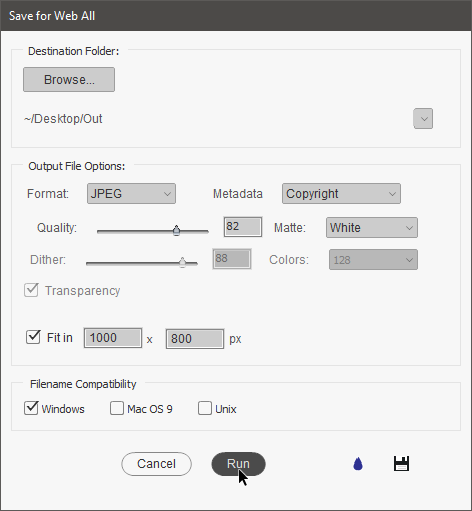
"Save for Web All" script automates the image exporting to Web-friendly formats.
- From the "Scripts" dialog launch the "Save for Web All" script.
- In the dialog box that opens, click the "Browse" button and choose a directory where you wish to save the Web-optimized copies of the original images.
- In the "Output File Options" area, choose a format and adjust its optimization settings.
- Click the "Run" button.
To save for Web, an entire folder of photographs, you use the "Batch" tool:
- Open any image.
- Run the "Save for Web All" script, choose the destination folder, format, and optimization options.
- Click the "Save and Close"
 button to make the script remember your settings.
 - Open the "Batch" dialog.
- Select for execution the "Save for Web -batch edition" script.
- Choose the "Source" directory and "Destination" options.
- Choose the source directory and "Destination" options.

